Ever wish you could design your own t-shirt or have you ever needed to create t-shirts for a group, say a group of friends wanting to do a race together? Make a homemade silk screen!
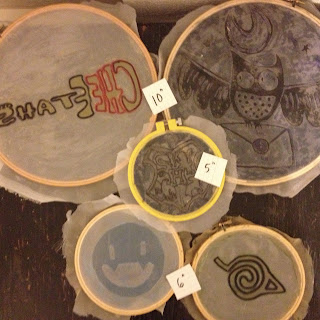 |
| a few of my past screens |
I created the "Cheetahs Rock" design above, and I have already had several people say they want one for their school, too. Since I love creating silk screens using embroidery hoops and Mod Podge, doing so will be a lot of fun! The materials for this project are readily available, inexpensive, and allow for many possibilities for the budding print artist. The resulting screens enable multiple prints (while the screens are still wet) and multiple uses/colors (after being rinsed and dried).
MATERIALS: CHECKLIST!
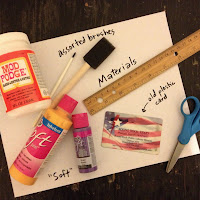
Pen/pencil/marker, Paper (to create design and cover work surfaces), Ruler, Scissors, Embroidery hoop (to fit design; they come in sizes from 4"-10"+), Assorted brushes, Mod Podge (gloss or matte work well), Fabric paint (or any acrylic if flexibility of printed surface is not a concern), Plastic "credit" card for squeegee (I used an old library card!), Iron, Painter's tape (optional), Iron-on embellishments (optional), shirt, and SHEER FABRIC.
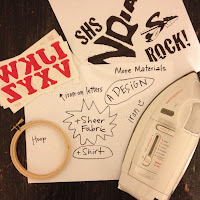
SHEER FABRIC is in all caps because it is of utmost importance. There are different sheer fabrics out there, and many of them work well. I'm in the process of testing different fabrics to see which ones give the best print. What I currently use, though, is called "Curtain Voile" or "Curtain Sheer." There are also "Costume Sheer" and even "Organza." Each one of these have something in common: TINY holes created by the weave of the threads. If you want a more pixelated look, there are meshes available with larger holes (sometimes square, but usually diamond or hexagonal). What I use in this tutorial is called "Curtain Sheer," and when I hold it up to the light and give it a stretch, I can see tiny holes in the weave of the fabric. That'll work!
ONE: DESIGN!
Create your design. I created my guitar design using
GIMP (click on it to find out more) and then printed it off in black and white on letter-sized paper. Make sure the design lends itself to one or two colors. The more colors you use, the more screens you will need (unless you decide to hand paint in places). Pay attention to the black areas as those are usually where you want the color to be.
TWO: CREATE SCREEN!
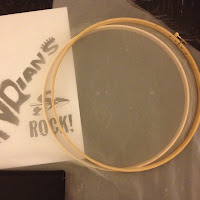
Put hoops on top of the printed design to see which size fits best. Try to keep at least a half inch between the design and the hoop's rings. Separate the hoop halves. Leave the smaller ring on your work surface. Place the sheer fabric on top. Place the adjustable ring over it and tighten.
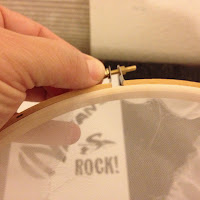
Trim fabric around the outer edges (leaving 1-2 inches for adjustments).
Pull the fabric gently all the way around the hoop. Tighten the hoop as you go. The goal is to have no wrinkles and to have the screen be nice and taut.
THREE: TRANSFER DESIGN!
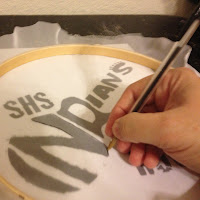
Place your design on a flat work surface. Place the screen so that the fabric is in direct contact with the design. Grab a writing utensil that won't bleed, and carefully trace the design. (If I'm doing more than one color, I place a symbol in the areas with the non-dominant color, but it's even better to use another hoop to create a second screen for the second color.)
FOUR: MOD PODGE!
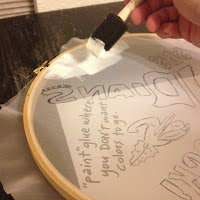 |
| I start by blocking out the design. |
Put some paper down to protect your work surface. Grab your assorted brushes and "paint" the Mod Podge onto the areas of the screen where you do NOT want paint to go.
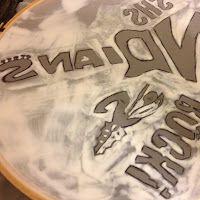 |
| The Mod Podge dries quickly. |
Don't worry if the glue seems to collect in lumps and hills. It's a good idea to run glue over the wood edges as well. Let it dry in the same position you painted it.
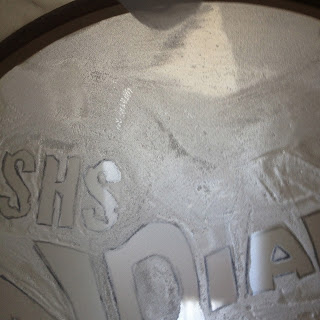
Once dry, hold it up toward light. You may see some holes that you missed. Put Mod Podge on them. Let dry again and retest against light. No tiny holes open where there should be glue? Yeah!
FIVE: TEST ON PAPER!
Put a sheet of paper on your work surface. Set the hoop on the paper so that the screen is in direct contact with it. Squirt a "line" of paint near the design. Grab your plastic card and pull the paint across the design in a couple directions. Press, but don't press too hard. Set aside your plastic card and then lift the screen straight up. Set aside your screen and check for any stray dots or lines that aren't supposed to be there. If you find any surprises, you need to rinse your screen with water, let it dry, and then go back to the "light test" on step four to add Mod Podge to necessary areas. You could also choose to not "fix it"--let it add to your print's character! :)
SIX: PRINT!
Once you are happy with your test print, get out the t-shirt(s). Place cardboard or paper between t-shirt layers to protect against bleed-through. Put the readied t-shirt(s) on a flat work surface. Place the screen on the shirt in the desired location so that the screen is in direct contact with the t-shirt. (If you are using two colors on the same shirt, place painter's tape over second-color areas.)
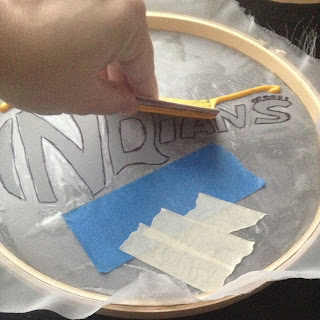 |
| This picture shows part of the design taped off. |
Squirt a "line" of paint near the design. Grab your plastic card and pull the paint across the design in a couple directions. Press, but don't press too hard or paint will get under the screen. Set aside your plastic card, and then lift the screen straight up.
Do the next shirt and the next and so on. (Print one color at a time. So if you're doing more than one t-shirt, print all the yellow first, rinse and dry the screen, and then go back to do the second color on dry t-shirts.)
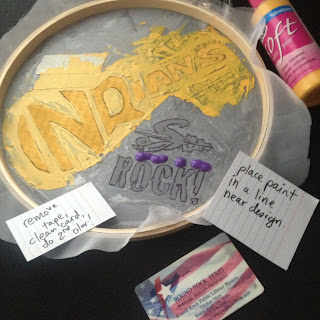 |
| You'll get better about knowing how much paint is needed. |
In the picture on the right, my screen is still wet from the first color. Only do it this way if you're making one shirt from start to finish. You can even use a paintbrush instead of a squeegee to transfer paint in delicate areas.
SEVEN: SAVE THAT SCREEN!
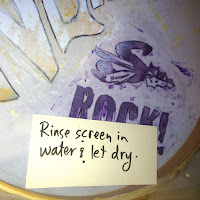
You're going to want to re-use that screen when friends want another shirt, so you need to rinse it. Gently rub your fingers across the screen under running water. Mod Podge is waterproof once it's dry, so don't worry about rinsing it away. It's always a good idea to do a "light test" before using the screen again. Then touch up as needed. Having said this, I've never needed to touch up before a second or third use.
EIGHT: TOUCH UP!
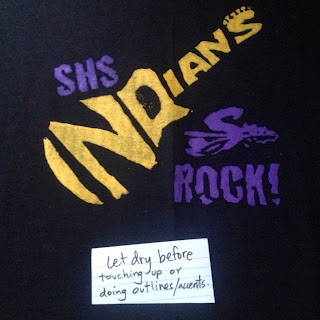
Grab a detail brush and fabric paint to touch up places there wasn't enough paint or to add second-color details. For second colors, work with a dry t-shirt.
NINE: HEAT SET!
If your print is on a t-shirt, follow the paint's label directions for drying times and heat-setting. MAKE SURE that the paint is dry before you iron it. Always use a cotton press cloth (a thin, white dish towel works!) or white paper between the design and the iron or you could ruin both! This is also a good time to add iron-on embellishments (like sparkles or words); just follow package directions and use a press cloth. You can heat set a design by placing a press cloth over it and ironing the design for 30-45 seconds. Wash it following the paint's directions. You might be able to wash on warm and dry it on low, but the print and t-shirt material will look better longer if you wash it in cold and hang it to dry, especially if there are iron-on embellishments.
TEN: ENJOY!
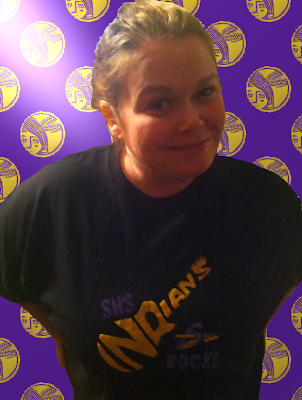 |
Put that t-shirt on and wear it like you mean it! :)
That's my sister! |
OK. I admit that I get really impatient sometimes! See the letter "D"
below? Yep. I didn't test the screen on paper first, and I didn't see that the "D" needed more Mod Podge. Fortunately, my sister thinks it adds to the shirt's character!
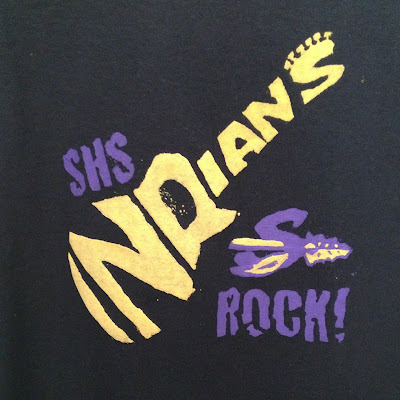 |
| Oopsie! Lesson learned! |
If you have questions about the tutorial, just email me!


 Pen/pencil/marker, Paper (to create design and cover work surfaces), Ruler, Scissors, Embroidery hoop (to fit design; they come in sizes from 4"-10"+), Assorted brushes, Mod Podge (gloss or matte work well), Fabric paint (or any acrylic if flexibility of printed surface is not a concern), Plastic "credit" card for squeegee (I used an old library card!), Iron, Painter's tape (optional), Iron-on embellishments (optional), shirt, and SHEER FABRIC.
 SHEER FABRIC is in all caps because it is of utmost importance. There are different sheer fabrics out there, and many of them work well. I'm in the process of testing different fabrics to see which ones give the best print. What I currently use, though, is called "Curtain Voile" or "Curtain Sheer." There are also "Costume Sheer" and even "Organza." Each one of these have something in common: TINY holes created by the weave of the threads. If you want a more pixelated look, there are meshes available with larger holes (sometimes square, but usually diamond or hexagonal). What I use in this tutorial is called "Curtain Sheer," and when I hold it up to the light and give it a stretch, I can see tiny holes in the weave of the fabric. That'll work!
 Put hoops on top of the printed design to see which size fits best. Try to keep at least a half inch between the design and the hoop's rings. Separate the hoop halves. Leave the smaller ring on your work surface. Place the sheer fabric on top. Place the adjustable ring over it and tighten.
 Trim fabric around the outer edges (leaving 1-2 inches for adjustments). Pull the fabric gently all the way around the hoop. Tighten the hoop as you go. The goal is to have no wrinkles and to have the screen be nice and taut.
 Place your design on a flat work surface. Place the screen so that the fabric is in direct contact with the design. Grab a writing utensil that won't bleed, and carefully trace the design. (If I'm doing more than one color, I place a symbol in the areas with the non-dominant color, but it's even better to use another hoop to create a second screen for the second color.)

 Once dry, hold it up toward light. You may see some holes that you missed. Put Mod Podge on them. Let dry again and retest against light. No tiny holes open where there should be glue? Yeah!

 You're going to want to re-use that screen when friends want another shirt, so you need to rinse it. Gently rub your fingers across the screen under running water. Mod Podge is waterproof once it's dry, so don't worry about rinsing it away. It's always a good idea to do a "light test" before using the screen again. Then touch up as needed. Having said this, I've never needed to touch up before a second or third use.
 Grab a detail brush and fabric paint to touch up places there wasn't enough paint or to add second-color details. For second colors, work with a dry t-shirt.